
While on a quick trip to Home Depot the other day, I spotted a 75% off Christmas clearance table with the cutest little pot that only cost 97 cents!
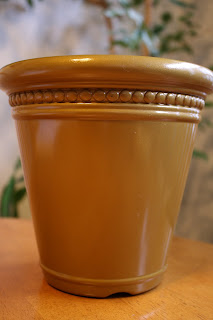
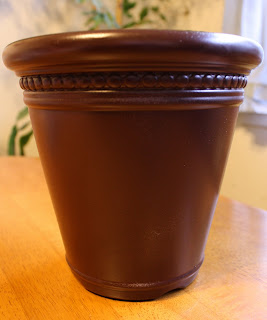
Ok, so maybe the color isn't so cute, but I loved the detail at the top and knew I could fix the color with a lil' bit of spray paint. I was pondering doing a solid color, but really, what's the fun in that?! Instead, I decided to attempt the look of stone. This is what it looked like after a coat of primer and a bottom coat of brown spray paint.
I gathered several craft paints with absolutely no plans as to what to do.
 I finally just grabbed an off white and tan color, wet the sponge, and started sponging away. This is what it looked like after the first coat (don't worry - it gets better).
  TIP: If you are impatient like me, you can take a hair dryer to it vs. letting it air dry. Apply as many coats as you need to get the look you want. The most important thing is to use 3-4 colors and don't over blend. You want all the different colors to show through. Also, make sure to at least partially paint the inside since the soil usually doesn't come to the top of the pot. My pot has the detail at the top, which I could've painted more with the light colors, but I like how seeing the dark brown gives it some dimension and age. This is what it looked like after 2 coats and some touch ups.
 Next, I sprayed it with some matte finish, which seals it, but the matte finish helps it retain the look of old stone.
 And now for the finished product (drum roll please):
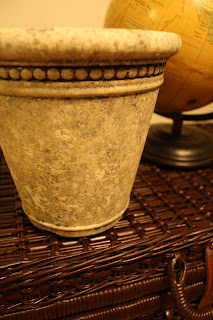 I am thinking I will plant an orchid in this pot, like the ones at Ikea.
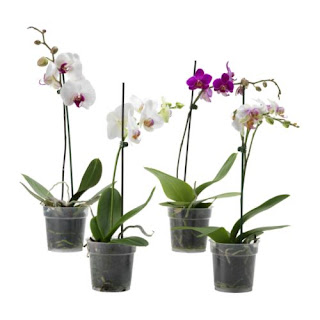
UPDATE: I wasn't quite happy with how the pot had a cool tone, so I ended up staining it with some wood stain. I love how it feels so much warmer now.


No comments:
Post a Comment